Tip: If you’re paying with a voucher, you’ll need your voucher code on the last step of this process.
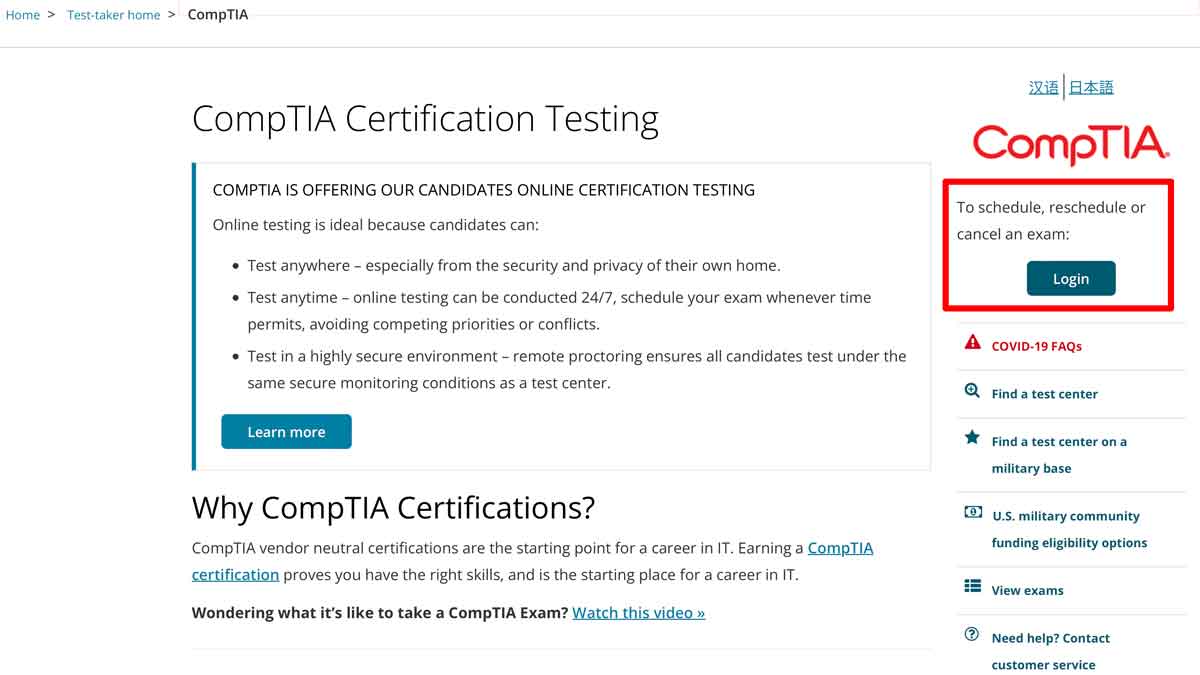
Step 1:
Pearson VUE provides exam services for all of the CompTIA exams. You should start the registration process on the Pearson VUE portal page at https://home.pearsonvue.com/comptia.
Choose the login button “To schedule, reschedule, or cancel an exam:”
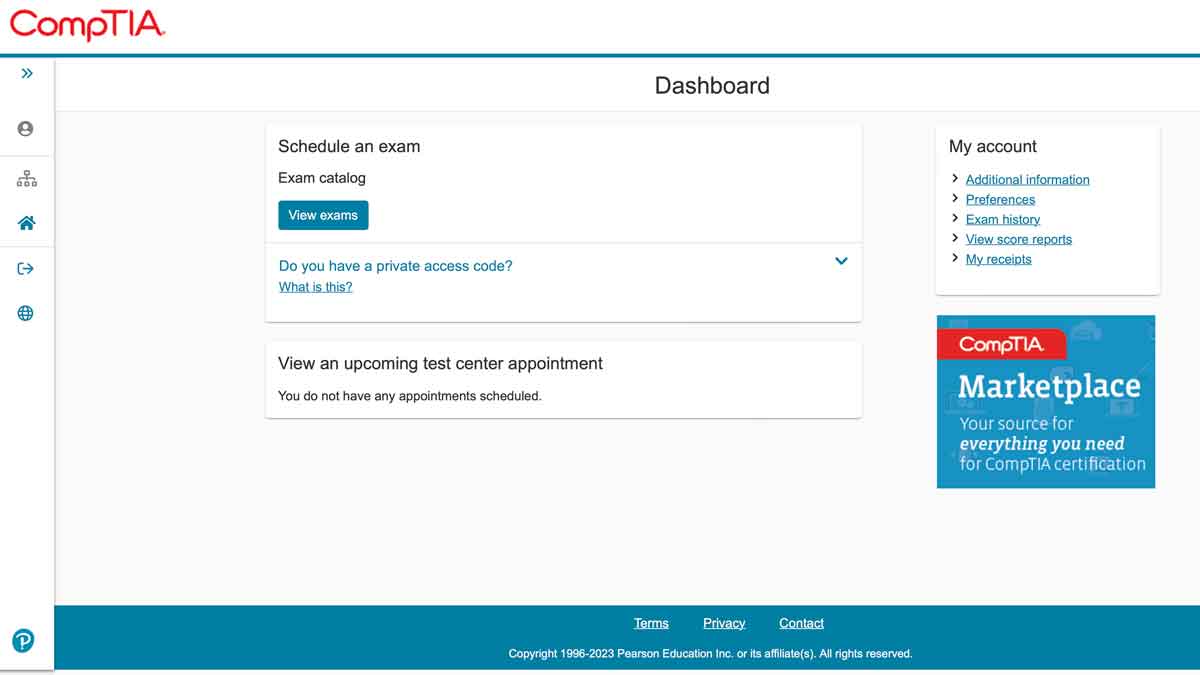
Step 2:
Login to the CompTIA portal. If you don’t already have a CompTIA account, you’ll need to create one from the login page.
Once you’re logged in, select the “Schedule Now” button:

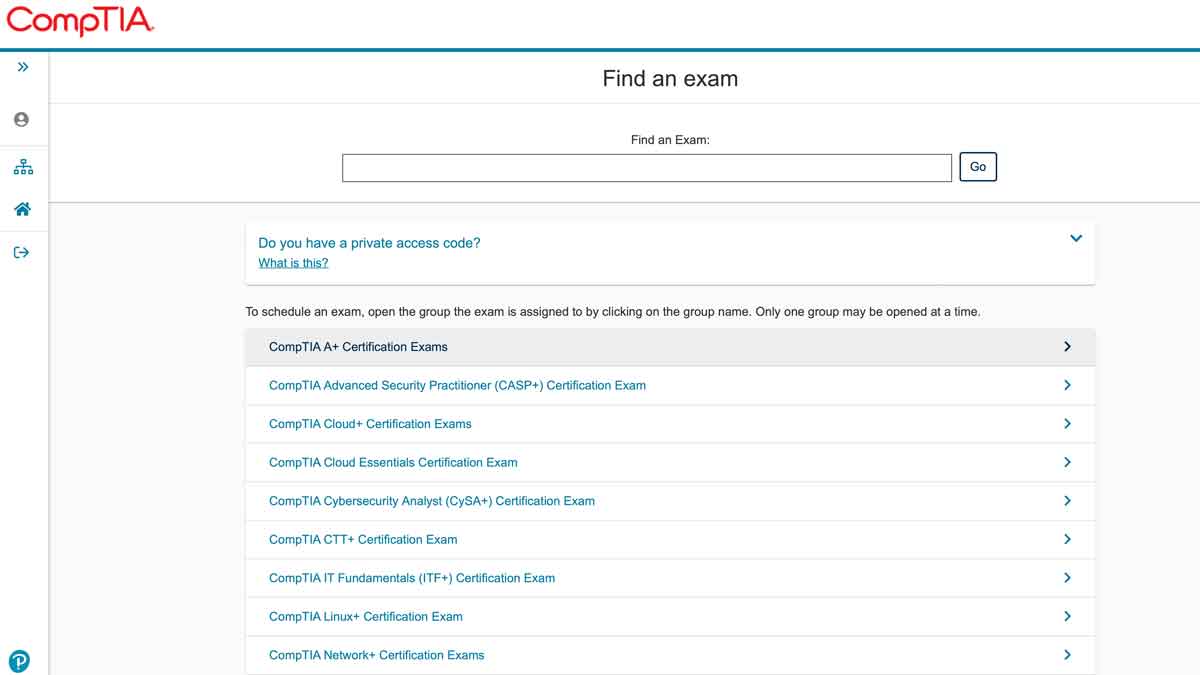
Step 3:
The scheduling process starts by selecting the appropriate exam.
Select the “View exams” button to view the list of available exams.
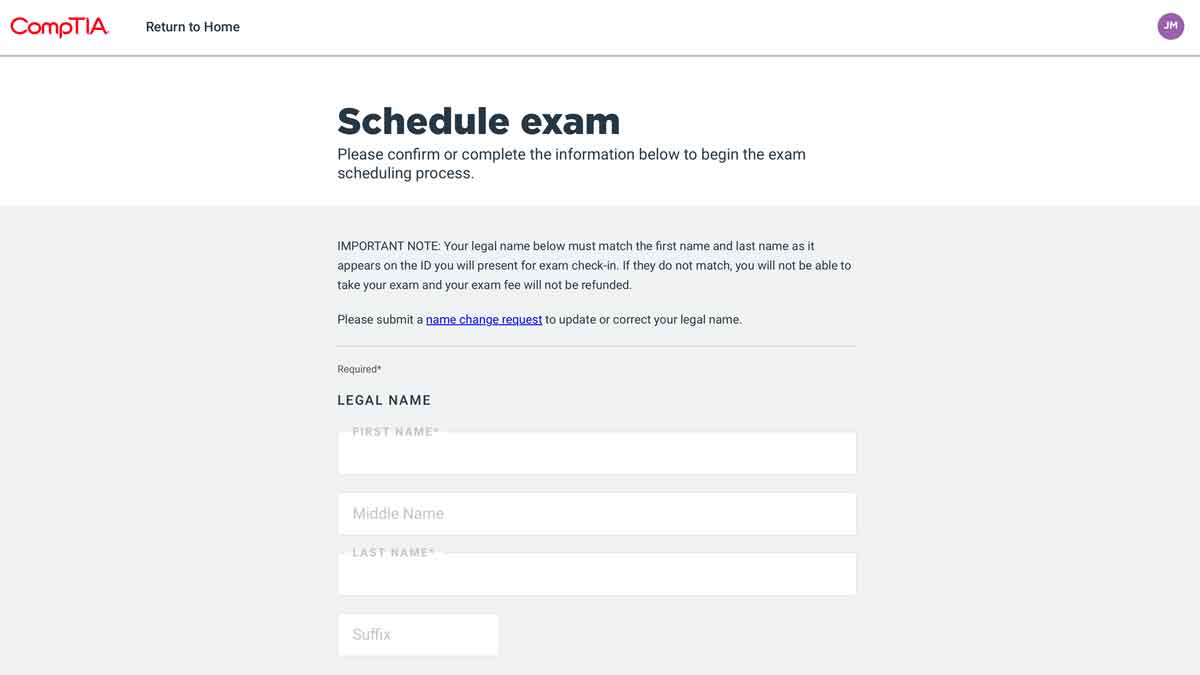
Step 4:
You’ll be asked to confirm your information before continuing with the registration process.
Make sure the information this page matches the name on your identification, and scroll to the bottom to “Save Updates.”
Step 5:
The “Find and exam” page provides a searchable list of available exams. Make sure the exam version you select matches the exam you’re planning to take!
Tip: The “private access code” on this page is NOT associated with any voucher codes. You’ll need your voucher code on the last step.
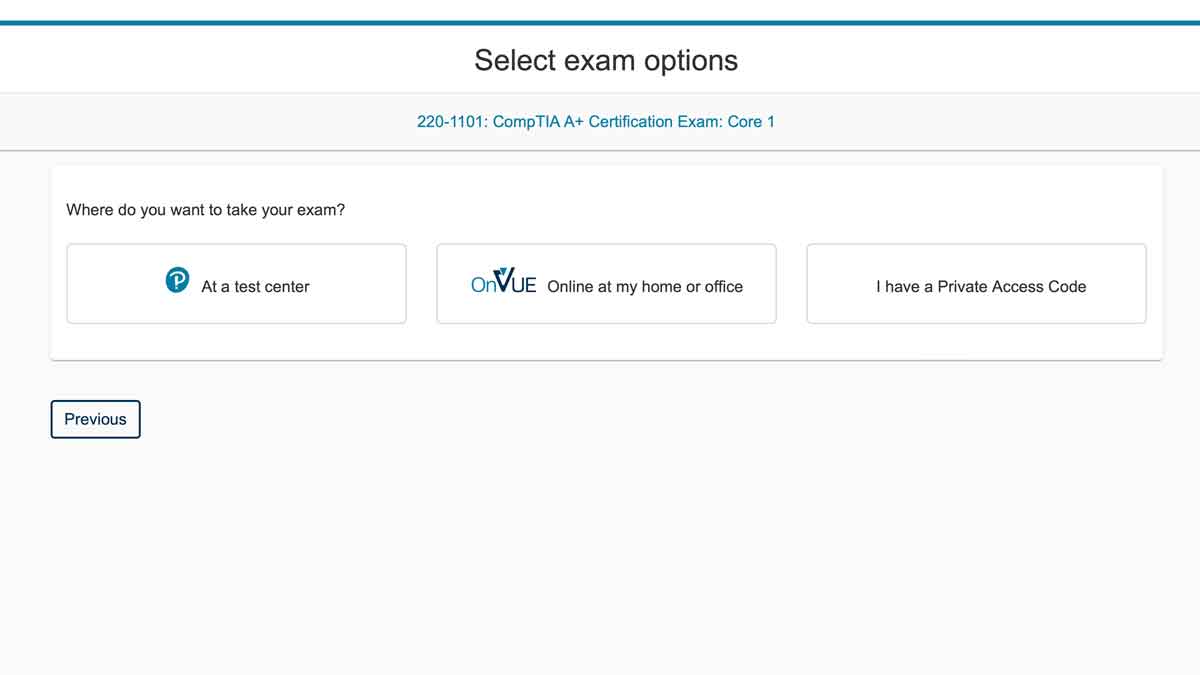
Step 6:
Where are you taking your exam? Select the option to take the exam a test center, or online at your home or office.
Note: The following screens may vary slightly based on the selected option.
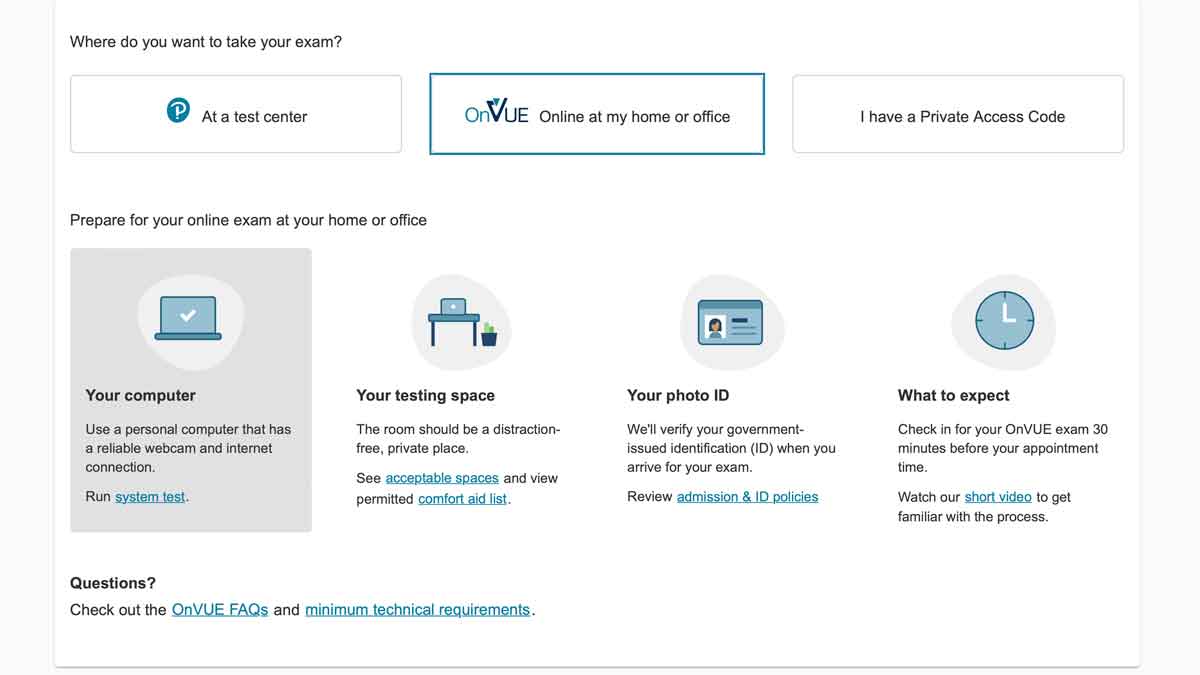
Step 7:
This page contains important information about your online or in-person testing and the identification you’ll need during the check-in process.
Tip: There’s a lot of good information on this page. Don’t skip it!
Step 8:
You may be asked for your testing language, and then you’ll be presented with the exam policy agreement.
If you agree with the terms, scroll to the bottom and “Submit” the agreement.

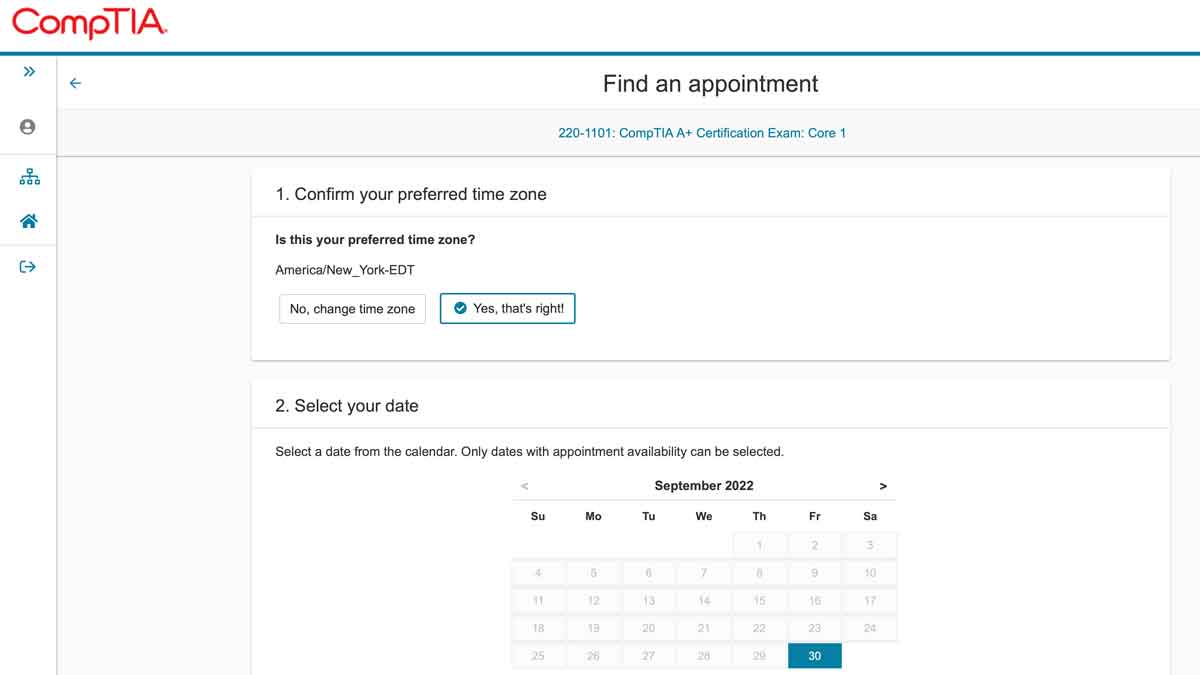
Step 9:
You’ll need to select an in-person testing location or a time for an online testing. Available dates and times will be available on the calendar.
Tip: Double check the scheduled time for your exam, and make sure the correct option for AM or PM is selected.
Midnight is 12:00 AM and noon is 12:00 PM.
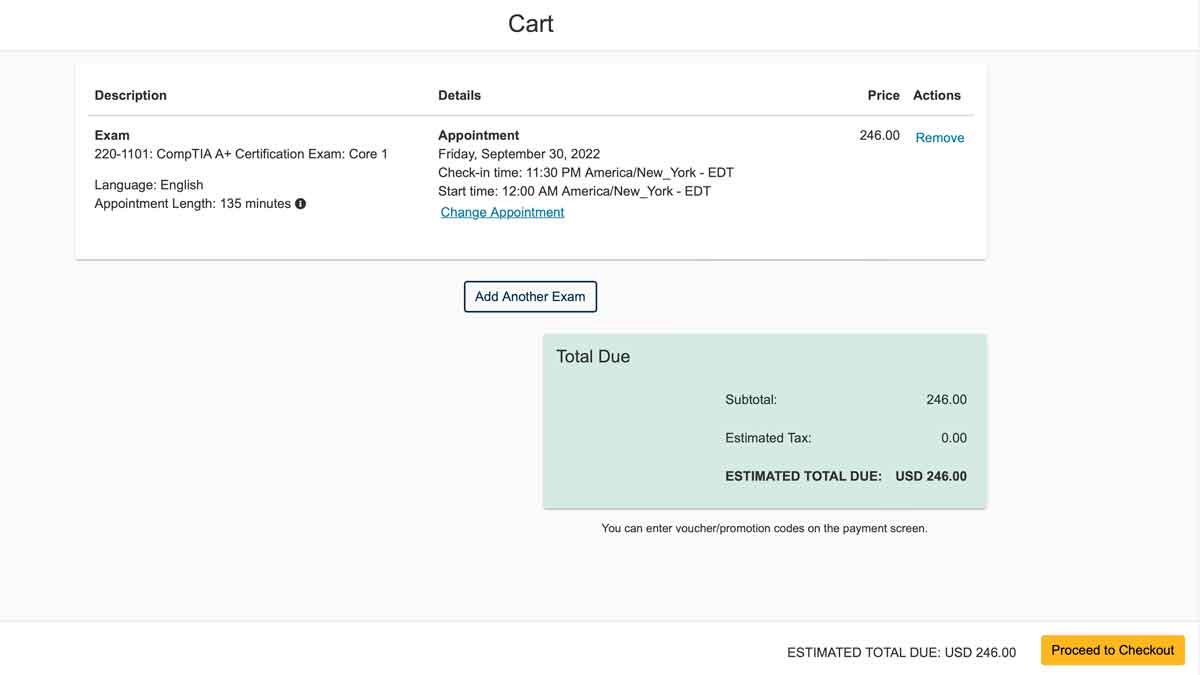
Step 10:
The Cart page shows a summary of the exam, appointment date, and price.
Note: The appointment length is not the same as the exam time. For example, an exam may allow for 90 minutes, but the appointment may show 135 minutes to cover check-in and administrative tasks.
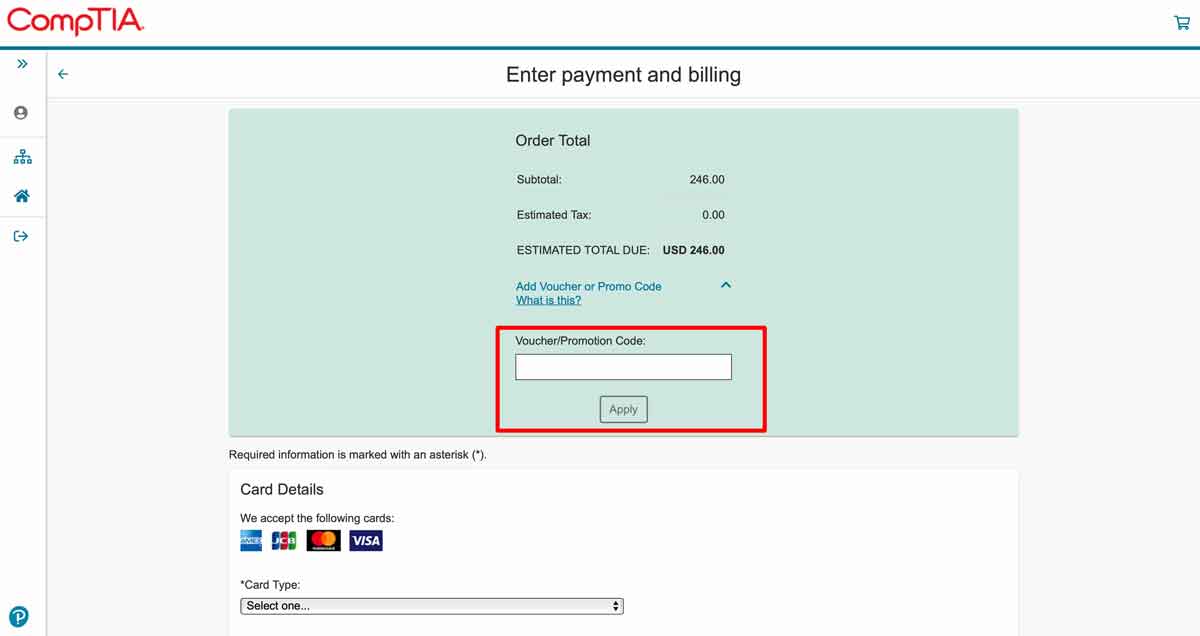
Step 11:
The last step is to provide payment information for the exam session.
Note: Your voucher code will be used on this page to cover the costs of the exam. Add your voucher code to the field on this page.
The scheduling process is complete, and you should now be ready to take your exam. Best of luck!